

How to apply and remove
Application instructions
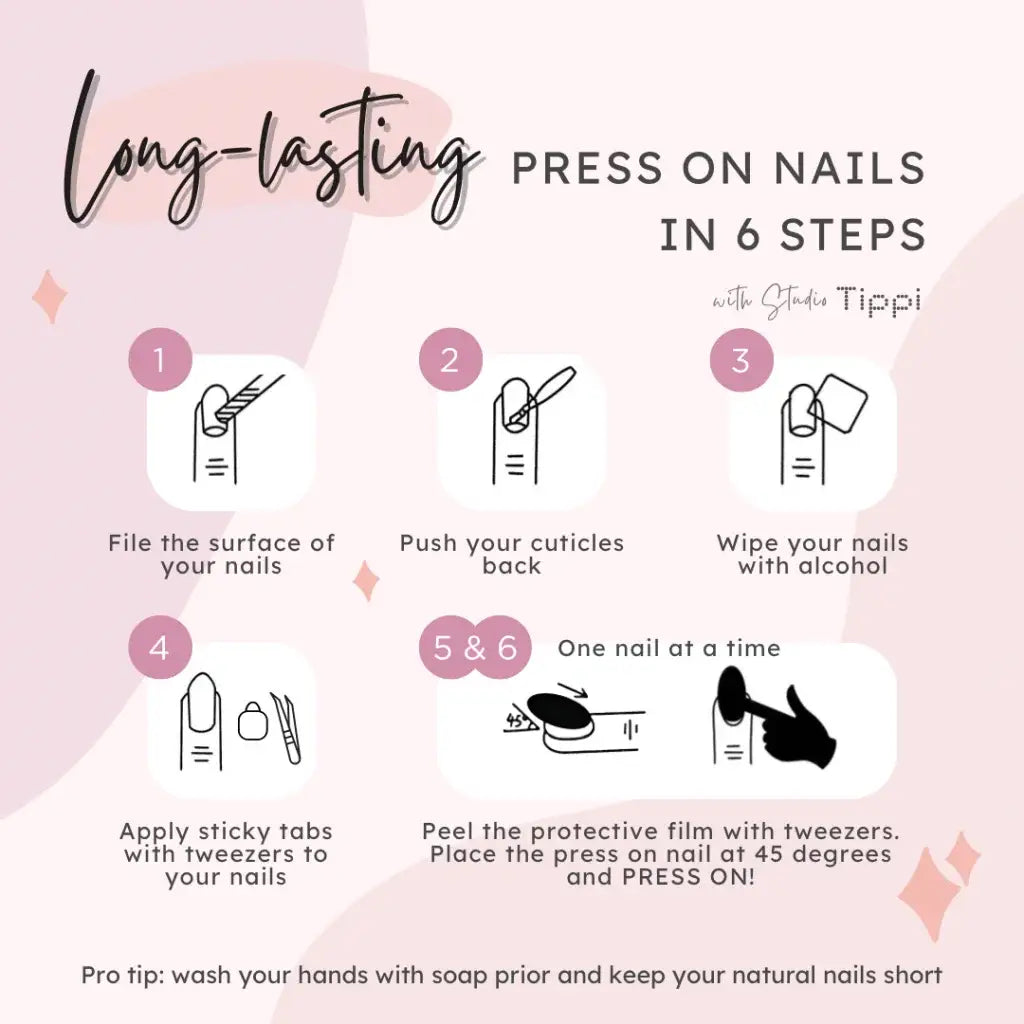
- Use a nail file to lightly remove the shine from your natural nail.
- Use the round end of the wooden cuticle pusher to push back your cuticle. This is to free all possible space on your nail bed.
- Use the alcohol wipe to clean off each nail of any dust or oil. This helps to dehydrate your nail for better adhesion.
- Match the adhesive tab to your nail size.
- Apply the adhesive tab to your nail. (You can use a pair of tweezers here.)
- Press the adhesive tab to push air bubbles out.
- Peel off the protective plastic film.
- Place the press on nail at a 45 degrees angle and press it down hard for about 5 seconds.
- Repeat the steps for each nail.
Removal instructions
- Use either end of the wooden cuticle pusher to loosen the edge of the press on nails.
- Soak your nails in warm water for 30 seconds.
- Repeat the first two steps if necessary.
- Clear the inner surface of the press on nails and your natural nail off any adhesive tab residue.
- Put away your press on nails and they are ready to be used again!
Tips and tricks
- Remove your press on nails when they start becoming loose so you don’t lose them.
- It’s best to keep your natural nails short.
- Round off any nail growth so it doesn’t show after you apply the press on nails.
- You can choose to repeat steps one to seven for all the nails before going to the next step. Sometimes it may be difficult to apply the adhesive tabs if you are not used to having long nails. Use a pair of tweezers if you need to.
- Use the alcohol wipe to clean the inner surface of your press on nails if you are reusing them for better adhesion.
- It’s natural that your press on nails may not stay on for as long as they can for the few times but practice makes perfect!